Wednesday, December 26, 2012

A better way to brew with raw wheat berries

I love witbier. I hate milling raw wheat. Sure, I could use flaked wheat from my local homebrew store, but I can buy raw wheat berries for less than half the price. If you decide to grind them with a two-roller malt mill, you will regret every step in your life leading to that decision. If you use a Corona-style mill, you will be able to crush the raw wheat, but not without a lot of elbow grease, and a poor-quality grind. Mine tends to pulverize part of the wheat to flour, but leave some berries intact. This is likely because the Corona mill was not made for barley/wheat/rye, it was made to grind corn into grits or masa.

Masa is made by boiling raw corn in water with calcium hydroxide, then grinding. You then make tamales or tacos with it. On an industrial scale, they dry it and sell it as the instant masa mix (just add water) you may be familiar with.

How does this help us? If we can boil corn to soften it, then use our Corona to get a nice uniform paste, maybe we can boil our wheat berries to soften them, making them much easier to grind evenly.

Step 1) Place wheat berries into a pot (size of which depends on how much wheat you're using)
Step 2) Add enough water to cover, with 2-3" of standing water above the submerged berries.
Step 3) Bring to a boil while stirring.
Step 4) Reduce to a simmer. Simmer for exactly 15 minutes.
Step 5) Strain off liquid.
Step 6) Crush the softened berries in your Corona-type mill.


Left: Wheat berries that were boiled before milling.
Right: Un-boiled, milled wheat berries.
Both bags contain the same total amount of wheat berries.

The boiled and ground wheat berries. You can see that the pericarp is mostly intact.


A close up of the boiled and ground wheat berries. The pericarp is intact. The endosperm has been ground to flour.


A close-up of the unboiled, ground wheat berries. Notice the poor, irregular grind.


[Imaginary FAQ]

Why boil for exactly 15 minutes? 

5 minutes is too short. The berries will still be hard and a pain to grind. 10 minutes is better, but you'll shred most of the pericarp. 15 minutes gave the best results.

Wait, what's a pericarp? 

"Pericarp" is the name for the outer covering of a fruit.

But isn't wheat a grain, not a fruit?

A wheat berry is the fruit of a wheat plant, in the broadest sense of a "fruit." Barley and rye have husks covering their pericarp. Wheat lacks a husk. This is one reason why barley and rye are easier to brew with; the husk forms a natural filter bed for sediment during lautering.

Why should I care if I shred the pericarp?

Because wheat doesn't have a husk, using large amounts of wheat in a mash can lead to a slow or stuck lauter. If we can keep the pericarp of the wheat mostly intact, the pericarp will act like a husk, and help us filter the wort.

If the grain is wet, won't that clog up my mill?

If you're using a two-roller mill, that is possible, but it may not. If you use a Corona-type mill, it won't. Be sure to strain as much liquid as possible, but don't worry if the grain is still damp.

Ok, so the wheat looks prettier, but does it brew better? 

When I use this method, I see a faster lauter and clearer wort. The intact pericarp will make rice hulls unnecessary, even when using a large amount of raw wheat. Boiling the wheat has the secondary benefit of (partially?) pre-gelatinizing the wheat, making conversion quicker and easier, without the need for a cereal mash.


Sunday, August 5, 2012

Triple-decoction vs. No-sparge + melanoidin malt.

I don't blog much anymore because I don't have a lot of free time, and I've decided I don't like posting low-quality content. I think this post might be interesting to some people, so I'm putting it out there.

This study was really easy to put together, very hard to analyze. I'm providing my data so you can look at it for yourself to decide if I draw a reasonable conclusion. If you disagree with my methods or results, it's easy to find qualified people on the AHA forum to serve as evaluators. Any study is useless if it can't be replicated, so I encourage anyone interested in this topic to organize their own study.

Latest version of results and summary.
Pre-taste questionnaire
Post-taste questionnaire
BJCP scoresheets

3X on the left, 5% on the right, chill haze on both.
Big picture (my conjecture based on this study and everything I know about brewing):
1) Decoction probably won't make your beer better.
2) Decoction mashing extracts more gravity from malt, and it probably extracts more compounds that can be perceived as "dry" as well. Whether that's good or bad for a given recipe will depend on personal preference and your targeted beer profile.
3) Using melanoidin malt doesn't emulate decoction mashing
4) There were a lot of contradictory descriptions of the beers. How people perceive aroma and flavor is complex and not easy to anticipate.

What the data supports:
1) Decoction increases mash efficiency.
2) There was no statistically significant correlation between the BJCP scores and recipe.
3) 57% of evaluators preferred the no-sparge beer with 5% melanoidin malt (5%) over the triple-decocted beer (3X), 29% had no preference, and 14% preferred 3X.
4) Judges were significantly more likely to correctly identify duplicate beers than expected based on a random guess.

What the data probably supports:
1) Small difference with 3X leaning toward dry/bitter, 5% leaning toward malty/balanced.

What the data might support:
1) No difference other than color
2) Small difference, but no agreed-upon difference.
3) Either no-sparge or decoction had no effect, and the only difference was due to melanoidin malt, or vice versa.

What the data doesn't support:
1) Decoction makes a better beer
2) Decoction makes your beer maltier than using melanoidin malt w/no sparge.
3) Decoction makes a smoother beer
4) Decoction makes a beer more people prefer

Problems with the study:
1) Small sample size
2) I only have room for two fermentors in my freezer, so I could only make two beers at once to compare. I could've made smaller batches, but I wanted them to be "typical" homebrew batch sizes.
3) There were some issues with inconsistent carbonation from bottle priming. I've never noticed a difference in carbonation levels in my beer before, so this was really interesting for me.
4) A couple samples may have had a low-level infection. If I could consistently brew perfect beer, I wouldn't spend so much time on the internet trying to learn about brewing.
5) Mixed variables: I framed the study as a comparison of no-sparge vs decoction because I wanted to confound evaluators' expectations. If decoction could provide some special je ne sai quoi beyond just darker color and increased maltiness in a way that melanoidin malt can't emulate, that should have shown up in the results, with more people preferring 3X or more people describing 3X in more favorable terms. In any case, it's possible the no-sparge, decoction or the melanoidin malt had no effect, but I'd say it's more likely that no-sparge or decoction had no effect and melanoidin malt had some effect.

Tuesday, May 1, 2012

A couple brew day pics

I'm working on something special. Details coming soon.

In the meantime, here's a couple pictures of my grist. I think it looks pretty good.


Waiting on some sparge water to heat up:


Friday, April 13, 2012

How to design a homebrew recipe, pt. 2

I brewed my Brut on Wednesday.

Here is my finished recipe:

19L batch size
Est. OG: 1.090
5.25kg Rahr Pils
750g Wheat malt
200g Aromatic malt
700g Dextrose (secondary addition)
300g Date sugar (secondary addition)

20g Magnum @ -60min for 19.4IBUs
18g Nelson Sauvin @ -10min for 7.9IBUs
18g Nelson Sauvin @ 0min for 0IBUs
20g Nelson Sauvin Dry-hop for 3 days, post-ferment

Wyeast 3711 @ 60* (I want to keep fusels low, so I'll start fermentation fairly cold)

1 tablet Whirlfloc
2tsp yeast energizer
50g French oak chips, med. toast

Mashed:
19L of water @ 158* for a step temp of 149* - 45min
pH was 5.5
Sparged with 15.4L

Collected 12L @ 1.074 and 15L @ 1.036 - 27L @ 1.053. 81.4% mash efficiency

90min boil

Pre-ferment pH - 5.7
Total volume - 20L @ 1.070
Pitched 3711 - 9m/ml @ 70*
Fermentation chamber set to 60*.

Water profile (mg/L):
Ca - 61.6
Mg - 6
Na - 2
SO4 - 6
Cl - 74
HCO3 - 36

Notes:
After a few days, I'll add the simple sugars. My yeast starter wasn't quite big enough to handle all the sugar at once.

How to design a homebrew recipe, pt. 1

Here is a brief description of how I design my beer recipes. When I started brewing, my recipes were a hodge-podge of ingredients, without a clear idea of what kind of beer I wanted. How do you know when you arrive if you don't where you're going? I've found it helpful to imagine the type of beer I want, and design the recipe around that.

I suggest you actually write this stuff down on paper, or back up remotely online. I have a cheapo school notebook I use. I lost all my recipes and notes when my last laptop died, so while I use my computer for design, I keep my notes and copies of my recipes in my notebook.

I'll start by looking at the BJCP Style Guide. I think it's important to brew to taste, not to style (unless you're brewing for competition) so don't feel beholden to the guidelines. I recently made a recipe for a Belgian Brut, a Champagne-like beer of which there are only a handful of examples. That didn't give me much to go on, but I felt what I wanted was close to a Belgian Golden Strong Ale, with a few tweaks.

My desired beer profile:
Aroma: Fruity esters, prominent grapefruit aroma, spicy phenols, moderate hop aroma.
Appearance: Golden to orange (4-6 SRM?), highly effervescent, rocky head, good lacing, moderate-to-high clarity.
Flavor: Subtle but present malt flavor, extreme attenuation, moderate bitterness, fruity flavor, with subtle spice, moderate hop flavor.
Mouthfeel: Light body, high carbonation, but with decent structure and smooth finish.
Misc: High ABV for extended cellaring ability. Very high carbonation will require Champagne bottles.

How do I turn this into a recipe? I start with appearance, since that's the most straight-forward. Use a program like Beersmith or Hopville to start plugging in your ingredients, starting with your grains. Since I want a subtle, light malt flavor, I'll use pils malt for the bulk of my fermentables. I want a little color, and a little extra malt flavor, so I'll use a small portion of Belgian Aromatic malt. I want a dense, rocky head, so I'll need some kind of malt to increase head retention. Wheat (malted, unmalted, or torrified) is commonly used for this. I could have used Carapils to increase the head retention, but since I want extreme attenuation, I don't want to add any crystal-type malt.

So my grain bill looks like this:
Pils - 84%
Wheat malt - 12.1%
Aromatic - 3.2%

I want extreme attenuation, so I'll need to add simple sugar. There are many sugar options. Plain table sugar or dextrose would work fine for increasing attenuation. I want a fruity flavor though, so I'll use a percentage of date sugar.

Sugar bill:
Dextrose - 70%
Date sugar - 30%

My fermentables bill is now:
Pils - 72.4%
Wheat malt - 10.3%
Aromatic malt - 2.8%
Dextrose - 10.3%
Date sugar - 4.1%

I want moderate, clean bitterness, so I'll use Magnum hops for bittering. For the grapefruit and hop aromas, and fruity flavors, I'll use Nelson Sauvin for aroma and flavor additions. I don't want a ton of hop flavor and aroma, so I'll stick to around an ounce or so.

Hop schedule:
20g Magnum @ -60min for 19.4IBUs
18g Nelson Sauvin @ -10min for 7.9IBUs
18g Nelson Sauvin @ 0min for 0IBUs
20g Nelson Sauvin Dry-hop for 3 days

For yeast, I'm looking for fruity esters and spicy phenols. Some British yeasts may give fruity esters, but since I want spicy phenols as well, that narrows it down to Belgian-style yeasts. Since I want extreme attenuation and a smooth mouthfeel, I decided to go with Wyeast 3711, the Brasserie Thiriez strain.

I want to make sure I have a solid mouthfeel, even with the high attenuation. For this, I'll add 50g of oak chips. To complement the spiciness from the yeast, I'll choose French oak, medium toast.

I'm shooting for 10-11% ABV, so I'll scale my fermentables to a gravity of 1.090.

Sunday, March 11, 2012

Paradigm shifts in my brewing philosophy

I've brewed beer, wine, mead and cider for about eight years now. I still consider myself a "newbie," but along the way I've picked up some knowledge.

When I first started I approached brewing like I was making a cake. I got recipes online or at my LHBS, followed the instructions, and ended up with beer I was proud of, but wasn't all that great.

Soon I started formulating my own recipes. They were a generally a muddled mess of ingredients. I didn't fully understand how the flavors would interact. I made mediocre beer.

The first big shift in my thinking happened when I started looking into water chemistry. I think the importance of water chemistry is overestimated by most amateur brewers. Getting your mash pH in line is crucial, and is related to water chemistry, but trying to imitate "historic" brewing waters is a terrible idea, from my experience. The worst non-infected beer I've ever made was a pale ale with Burton-on-Trent water.

The next shift in my brewing philosophy was to pare my recipes down to make them as simple as possible. Plain old 2-row has a lot of flavor. I started thinking about the types of flavors I wanted in the beer, and adding ingredients with purpose. My brews turned out much better.

The latest shift in my brewing philosophy came when I realized how important proper yeast health is to good fermentation. More on that later.

Saturday, February 25, 2012

Brew Shed pt. 2

After several more days of cleaning, it's starting to look like an empty box!


I found both water and termite damage, so it'll take a bit more work before I'm ready to finish the walls. I pulled out all the insulation that was in really bad shape.

Friday, February 24, 2012

Brew Shed pt. 1

I've been busy cleaning up an old shed on the property. I plan on having a cold room (40-50*F), cool room (60*F) and brewing space. Here's a sketch:
As far as I can tell, the previous owner had never cleaned the shed in the 30 years he owned it. It looked like something out of that Hoarders show when I started. Here are some pictures after several days of cleaning:


Still a lot of work to be done.

Saturday, September 17, 2011

Pickled peppers update

The two smaller jars developed some really funky smells and some nasty gray mold. I think some clostridium took hold in those, so I tossed them. I've read that if fermenting veggies get mold you can just scrap it off, but the smell was pretty rank so I didn't want to risk it.

The big jar has been chugging right along though, with no mold and just a pleasant tart aroma.

Tuesday, September 6, 2011

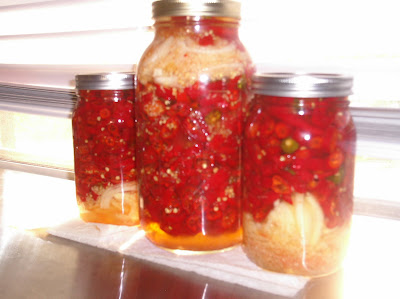
Half-a-peck of pickled peppers

Brewing has opened me up to the world of Lactic fermentation. My neighbor got a good deal on a bushel of cayenne peppers and gave me 3lbs. Here's the recipe I used:

3lbs cayenne peppers
6tbsp of salt
4tbsp sugar
8c H2O
8tsp minced garlic
2 large onions
3tbsp of Kimchi juice

I heated the water, sugar, and salt to thoroughly dissolve, then cooled. I sliced the peppers into rings, and put into jars with the garlice and sliced onion. I then filled the jars up with the liquid part, and added a tablespoon of liquid from kimchi to each jar, to kick off fermentation. This is probably not necessary, but I felt better doing it.

The next day they were bubbling away, and have been for about a week now.

In a few weeks, I plan on blending up the big batch and making hot sauce out of it, and keeping the small batches whole to use in place of pickled jalapenos.


Tuesday, August 23, 2011

Quick and easy cider recipe and tasting

Here's my super easy grocery store cider recipe:
5gal vol.
12-14 cans of apple juice concentrate.
1 tbsp yeast nutrient (DAP)
5 bags of Earl Grey tea
Water, probably ~4 gal
S-04 or T-58 yeast

Lactic Acid 88% at bottling (to taste)

Any kind/brand of juice will do, as long as it only has ascorbic acid as a preservative. So just juice, ascorbic acid, water.

Heat 1 gal of water to just off-boiling. Add the tea bags, and steep for 5min. Take out tea bags. The tea bags add tannin to the cider. If you have access to good cider apples (most apples sold are the desert kind, not really great for cider) then this step is unnecessary. Tannins add structure. In large amounts, tannins give red wines their "chewy" character, but in small amounts they lend a subtle body.

Add hot tea water to 2 gal of cold water. Do not add hot water directly to fruit juice. If you do you'll set the pectins and the cider will never clear.

To the now cool 3 gal of tea water, add most of the apple juice concentrate. Check gravity. Adjust volume/gravity until you hit 1.050 and have around 5 gallons of juice.

For a sweeter, appley-er cider, ferment with S-04. For a drier, tart, slightly spicy (think cloves) cider, use T-58. Ferment as close to 60* as possible. Should be ready to bottle within 7-10 days, but verify via hydrometer. T-58 will take longer to clear. S-04 will blow through the sugars within a few days and flocc out quickly.

My T-58 bottomed out at 1.010. My S-04 hit 1.016 and flocc'ed. I transferred to secondary and it's still very slowly bubbling away. I bottled the T-58 part of the batch a few weeks ago, and I'm drinking it now. It tasted a little lifeless at bottling time, and the pH was around 3.4. I added 15ml of lactic acid to drop the pH to 3.0. At that pH, it tasted "brighter."

Tasting notes

Appearance: Clear and golden.

Smell: Lightly apple, some bergamot/citrus aroma.

Taste: Fairly dry, a little bland in the middle, but it has a very nice finish. The bergamot from the Earl Grey really shines through in the finish, and nicely complements the apple flavor.

Mouthfeel: Carbonation ended up a little bit low, but it has a nice texture. The tannins complement the dryness well.

Overall: For how simple and easy it is, it makes an easy-drinking, semi-dry cider. I've made cider previously with better juice and wine yeasts and was underwhelmed. Ale yeasts are much better for cider making. If you have access to higher quality apple juice, the product will turn out much better. I was limited by what was available at my local Wal-mart. I think the combo of T-58 with good juice would make a really nice cider.


Wednesday, August 17, 2011

New glassware

I moved to rural Missouri from Colorado for work. I grew up in Fruita, went to school in Boulder, and lived in Denver most recently. Pretty much everyone is perplexed as to why I would move here, even native Missourians. I would've guessed the natives liked living here, but they all seem to think Colorado is nicer. In a lot of ways it is, but there are some cool things about living out in the boonies. One of them is the awesome antique stores and flea markets. You can find some really good stuff here for pretty cheap. My latest haul was $5.

Here are my latest beer-related finds:


A Löwenbräu weizen/pils-ish looking glass and an Old Milwaukee chalice. I was pretty happy to find the chalice. I used to have a Belgian goblet, but I lost it somehow.


I also found an old medicine jug. Not sure on the volume, but it looks like it's about 3L. I've been looking for a good 3L-ish jug for starters. I've been using 3L plastic jugs so far without issue, but I'm worried about long-term contamination issues.

I found some 10gal ceramic crocks like my grandparents used to use to make beer in, but they were in great shape and were $110, so I didn't pick those up.

First Berliner Weisse, pt. 3 - boil and pitch

Gravity when pitching yeast: 1.016
PH when pitching yeast: 2.3

After 24 hours, the wort + sour starter was going nuts. A white pellicle covered the entire top, and lots of CO2 was coming off. The pellicle was there in the morning, but when I went back in the afternoon to take a picture, it was mostly gone, but you can still see a bit on the edges:


After reading a bit more about different Lacto strains, it seems most of them are heterofermentative, even the strains from the yeast labs. My pre-boil gravity was 1.028, and when I checked the wort, it had dropped to 1.016 and the pH was down to 2.3. Lactic acid has pretty much the same gravity as sugar. The gravity drop was most likely due to the lactic acid producing alcohol. It tasted fine, a bit sour, but still pretty sweet. I think once it's done fermenting it'll be pretty puckering.

Here's the bit that I did differently from most Berliner Weisse recipes. Most Berliner Weisses aren't boiled, or are only partially boiled. Since my pH was plenty low, and since I had no idea what other nasty bugs I may have cultured from the grain, I chose to boil a little under half of the wort, and pasteurize the rest.

The half I boiled got the hops, then after a 30min boil, I added the rest of the wort and held between 145-150*F (That's 63-65 for the Centigrade folks) for 30min. The process is called vat pasteurization, and should provide a 3-log kill (99.9%). You can pastuerize faster at higher temperatures, but since my bugs made alcohol too, I didn't want to boil off all the alcohol of an already low-gravity beer.

After I chilled it, I pitched about half of a yeast cake from a batch of Koelsch. This is definitely overpitching in normal circumstances. With the low pH, I was worried about poor yeast performance.

I was quickly running out of daylight last night, so I didn't get a lot of pictures, but here's one of my setup. Bayou Classic KAB-4 burner, 60qt pot, little March pump, and a homemade immersion chiller.


Sunday, August 14, 2011

First Berliner Weisse, pt. 2 - Mash and souring

Got the wort into the carboy to start souring tonight. Here's a picture of the setup for the sour starters:
After about 24 hours, the starters smelled strongly of lactic acid (think sauerkraut). They may have had a slight acetic (vinegar) smell, but were otherwise very clean. I was worried about mold/funk/terrible aromas and flavors, but none of that happened. PH for the solutions were 2.9, +/-0.1, indicating Lactobacillus activity. While they tasted sour, they also tasted sweet, so the Lacto didn't eat all the sugars from the starter.

The bug I'm interested in is called L. delbrueckii, which I believe is homofermentative and thermophilic, meaning it likes hot temperatures and just makes lactic acid, not acid and alcohol like some Lactobacillus strains do. By keeping the temp as high as possible, but below 120*, the L. delbrueckii should grow preferentially over other bugs that may have been on the grain.

It turns out I didn't really need any of that headspace, so next time I'll fill them up higher to minimize O2 and the risk of acetobacter.

Here's the recipe I made for this beer:
Batch Size (L): 18.00
Total Grain (Kg): 2.62
Estimated OG: 1.034
Estimated SRM: 2.4
Estimated IBU: 5.4
Brewhouse Efficiency: 75 %
Wort Boil Time: 30 Minutes

Grain
------
68.7% - 1.8kg Rahr Pils Malt
31.3% - 820g of Colorado Malting Company Red Wheat Malt

Hops
------
25g - Willamette (Pellet, 2.0% AA) for 5.4 IBU

Yeast
------
Reused Wyeast 2565 Koelsch

Water Profile
--------------
Profile: RO

Mash Schedule
-------------
Saccharification Rest - 8L infusion, 30 min @ 151* F
No mash out
Sparged with cold water ~ 70* F

Notes
------
Collected more volume than anticipated.

Berliner Weisse isn't a very big beer. The grain bill looks tiny in my 10gal MLT. I chose to mashout with cold water because I was pressed for time and needed to finish up in a hurry.

I ended up collecting more wort than I anticipated. I'll check the preboil gravity and volume after it's done souring to adjust boil time and hop schedule as necessary.


Saturday, August 13, 2011

First Berliner Weisse, pt. 1 - Sour starter

The next brew in the works is a Berliner Weisse. This will be my first sour beer so I wanted to start off with something easy. The first step is to make a starter for the Lactobacillus delbrueckii. Pure strains are available from Wyeast and White Labs, but malted base grains are lousy with Lacto (among other things). Since my LHBS is an hour away and doesn't have any bacteria anyway, and it would cost too much to buy a culture online and ship it, I chose the grain route.

Here's the recipe I used:

Into 4L water
Add 400g dextrose
Heat to 110* to dissolve sugar
Divide into 3 growlers
Into each growler goes 1 cup of base malt

One growler got wheat malt, one got pils malt, and one got pale malt. PH of the sugar/water solution was 7.1. I placed the growlers in the shed and wrapped them with a brewbelt heater. Target temperature is 110-120* to maximize Lacto growth.

I wanted to do three separate starters to increase the chance of success. When I harvested wild yeast in the past, half of them took off with good bugs/yeast, and half of them got really rank and nasty. So this way, hopefully at least one will come out alright.

The camera ran out of batteries today, but the next update should have some pics.

Wednesday, August 10, 2011

Candi syrup secrets, and how to make your own

There is a lot of misinformation on the internet about candi syrup, what it is, and how it's made. After making 100 or so batches of candi syrup, and hundreds of hours of work and research, I have some insight on this.

First, let's start with what it is. "Candi syrup" or "Kandijsiroop" or "sirop de candi" is dark, richly flavored syrup made from sugar utilizing Maillard reactions and caramelization. In Belgium, tariffs and subsidies make beet sugar much cheaper than cane sugar, so the "authentic" Belgian syrups use beet sugar. There is nothing particularly good about beet sugar. It's just what they use because it's cheap and convenient. The sugar refining process removes any impurities, leaving only the pure sucrose. Beet sucrose is chemically identical to sugar cane sucrose.

Maillard reactions are a complicated set of interactions between a nitrogen source and reducing sugars. Examples of reducing sugars are glucose and fructose. Sucrose is not a reducing sugar, therefore it is impossible for Maillard reactions to occur with sucrose. It is impossible to have Maillard reactions with pure beet or cane sugar in its natural state. To allow the Maillard reactions to occur, one must invert the sugar from sucrose to glucose and fructose.

Sugar can be inverted by heat or acid, or both. The rate of chemical reactions increases with temperature. While it may take several days for acid to invert sucrose at room temperature, it can happen in 30min if boiling. Once the sugar has been inverted, the sugars have become reducing sugars, which can form Maillard products. Any remaining acidity must be neutralized with a base of some kind.

All the manufacturers of candi syrup that I'm aware of claim their product contains only sugar, and is made by repeated heating and cooling alone. This is unlikely to be true based upon the chemistry involved.

The misinformation over candi syrup is caused by two factors. The first is that recipes cannot be patented. The only way to keep your secret recipe from being stolen is to keep it, well, a secret. The other factor is FDA regulations on food labeling. "Process aids" do not have to be included on ingredient labels. "Process aids" are defined as "Substances that are added to a food for their technical or functional effect in the processing but are present in the finished food at insignificant levels and do not have any technical or functional effect in that food." Candi syrup manufacturers are not required to disclose which acids and bases they use in producing their syrups, and to disclose them would mean anyone could reverse engineer their product.

The FDA has guidelines on what products can be used in the production of caramel. Acceptable food-grade carbohydrates:
dextrose (glucose)
lactose
malt syrup
molasses
starch hydrolysates
sucrose

Acceptable acids:
acetic acid
citric acid
phosphoric acid
sulfuric acid
sulfurous acid
(In the UK hydrochloric acid is also used)

Acceptable bases:
Ammonium hydroxide
Calcium hydroxide
Potassium hydroxide
Sodium hydroxide

Acceptable salts include any combination of the following:
Ammonium, sodium, or potassium carbonate, bicarbonate, phosphate, sulfate and sulfite.

Lyle's Golden Syrup is a type of invert syrup made with hydrochloric acid and sodium hydroxide. The acid leaves chloride ions, and the base leaves sodium ions. Together they form sodium chloride, or common salt, in the final product.

Knowing accepted ingredients and a little bit about chemistry, we can make an educated guess into the true nature of candi syrup. I have no doubt the product begins as sucrose. Some acid and heat is added until the sucrose inverts. Any residual acid needs to be neutralized. Ammonium hydroxide (NH4OH) would both neutralize any residual acidity and provide a source of nitrogen for the Maillard reaction. If an alternative base is used, some other sort of nitrogen would be needed. Phosphates increase the rate of Maillard reactions, so an ammonium-phosphate salt would have the dual purpose of providing nitrogen and phosphate.

With this information, it is not difficult to devise a substitute for candi syrup. Here is a recipe I've come up with:

3oz Dextrose (corn sugar)
13oz Sucrose (table sugar)
1c H2O
1/2tsp diammonium-phosphate
1/2tsp potassium bicarbonate
1/2tsp lemon juice

1) Bring water and sugars to a boil
2) add 1/2tsp lemon juice
3) simmer for 30min between boiling and boiling+10*F (212*F-222*F at sea level)
Add water as necessary to keep temperature in correct range
4)Add 1/2tsp DAP
Add 1/2tsp KHCO3
Stir well to dissolve

5) Heat to 320*
Add 1/2c H2O
Stir well (be careful as sugar will sputter)

6) Heat to 310*
Add 1c H2O
Stir well
Pour in mason jar or other heat-tempered glass jar, or allow to cool and store in plastic

The reason I include a portion of dextrose (glucose) is that I've found dextrose will darken at lower temperatures than fructose, so having more dextrose will result in a roastier, darker syrup, while more fructose will result in a fruitier, lighter-colored syrup.

Another tweak you can make is heating the syrup to lower temperatures (you can get some nice vanilla flavors around 260*). You can also experiment with the number of heating/cooling cycles.

I encourage lots of experimentation to find what works for you. Maillard reactions are responsible for some amazing flavors, but also foul, acrid flavors. Finding the proper balance between the good and bad flavors is the hardest part of making your own candi syrup.